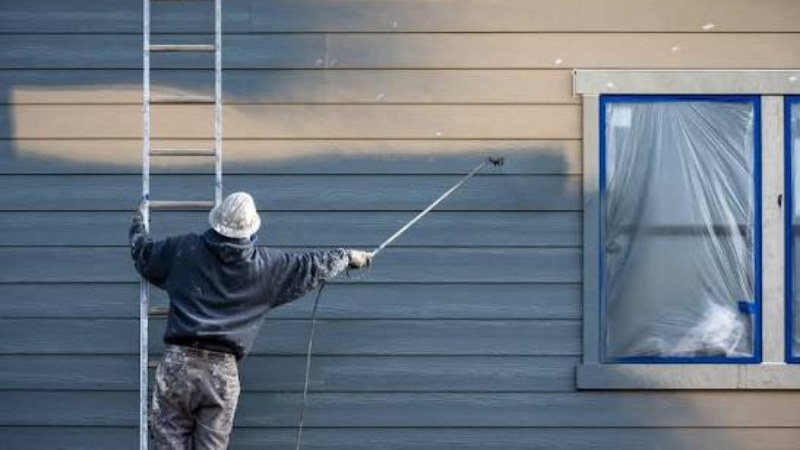
Vinyl siding is one of the most common residential painting jobs in the country and one of the most unforgiving for contractors who approach it without the right setup. A misprimed surface won’t adhere. An over-pressured tip can distort the vinyl. An incorrect spray angle leaves run marks that take 30 minutes each to fix after the fact.
Done correctly, a vinyl siding repaint is a fast, high-quality job that earns good margins. Done incorrectly, it’s a callback job and a damaged reputation. This guide covers the setup that separates the two outcomes.
The Fundamental Constraint: Vinyl Can Warp
Vinyl siding has a thermal expansion coefficient significantly higher than wood. A concentrated stream of high-pressure airless paint impacting vinyl at close range can cause temporary or permanent distortion, especially on darker colors that absorb heat. This happens when contractors use tip orifices designed for heavy coatings on smooth vinyl surfaces, or spray from too close a distance at too high a pressure. The proper setup eliminates this risk entirely.
Product Selection
Primers
Adhesion primer is required wherever the vinyl’s original factory finish is chalked, oxidized, or contaminated. Bonding primer formulated for vinyl improves adhesion across the entire surface and reduces the risk of peeling on the first repaint cycle. Confirm the primer you select is listed as compatible with vinyl substrates — not all exterior primers are.
Topcoats
Use paint specifically formulated for vinyl siding or a 100% acrylic exterior latex rated as compatible with vinyl by the manufacturer. The critical property is elongation — the paint must be flexible enough to move with the vinyl through thermal expansion and contraction cycles without cracking.
Very dark colors can cause vinyl to warp if the material exceeds its thermal limit. Most manufacturers publish guidelines on acceptable colors for vinyl repaints. Check these before specifying a color.
Equipment Setup
Tip Selection
| Application | Tip Orifice | Fan Width | RAC X Example |
| Smooth vinyl siding — topcoat | .013–.015″ | 10–12 inches | RAC X 413 or 515 |
| Vinyl siding — primer | .015–.017″ | 10–12 inches | RAC X 415 or 517 |
| Vinyl with heavy mill texture | .015–.017″ | 10–12 inches | RAC X 415 |
| Vinyl soffit and fascia | .011–.013″ | 8–10 inches | RAC X 411 or 413 |
A .015-inch orifice tip on a Graco Ultra 395 or 695 at properly controlled pressure produces a thin, even spray that lays flat on vinyl without the concentrated impact force that causes distortion. Avoid tips above .017 for vinyl topcoats. The full RAC X SwitchTip size guide at SprayersAndParts.com helps you match the exact orifice and fan width to your vinyl application before you buy.
Pressure Settings
Start at 1,500 PSI and increase only until you achieve a clean fan pattern without finger tails at the edges. On smooth vinyl with quality acrylic topcoat, most machines produce a good pattern at 1,500–2,000 PSI. Running at 2,500–3,000 PSI on vinyl creates excessive mist, wastes paint, and increases the risk of thermal distortion.
Gun Distance
Maintain 12–15 inches from the vinyl surface — slightly further than rough stucco or masonry. The additional distance allows the spray to open and soften before impact, reducing concentrated force on the panel.
Application Technique
Spray horizontally, following the lap direction of the siding panels. Begin each pass above the panel lap line, bring the gun down into the field of the panel, and finish below the lap — this ensures coverage under the laps without separate passes. Use 50% overlap between passes. After spraying each section, run a brush under the laps to ensure coverage in the shadow line.
Mistakes That Cause Callbacks
- Spraying surfaces above 90°F — paint dries too fast to self-level
- Skipping adhesion primer on chalky factory finish — topcoat peels within 12 months
- Over-pressurizing: 2,500+ PSI stream causes temporary or permanent panel bowing
- Not cleaning windows and trim immediately — dried acrylic on glass requires chemical removal
- Applying in full direct sun — follow the shade, one side of the house at a time
- Using a tip above .017 on smooth vinyl — heavy deposition on smooth surfaces causes runs
One maintenance item that dramatically reduces callbacks on vinyl siding jobs: replace your Graco spray gun filter (part 288749 fine mesh or 288750 standard) at the start of every color and every day. A clogged gun filter on vinyl siding produces the same symptom as over-pressure — an uneven, streaky pattern that only becomes visible as the job dries. Gun filters are $8–$12 for a 10-pack.
For contractors running large vinyl siding jobs — full subdivisions, multi-unit residential — the higher flow rate of the Graco Ultra Max II 695 reduces the continuous load on the pump during 8-hour production days. On vinyl specifically, the 695’s smoother, more consistent pressure delivery also reduces the pressure spikes that cause tip pattern inconsistency on smooth surfaces.